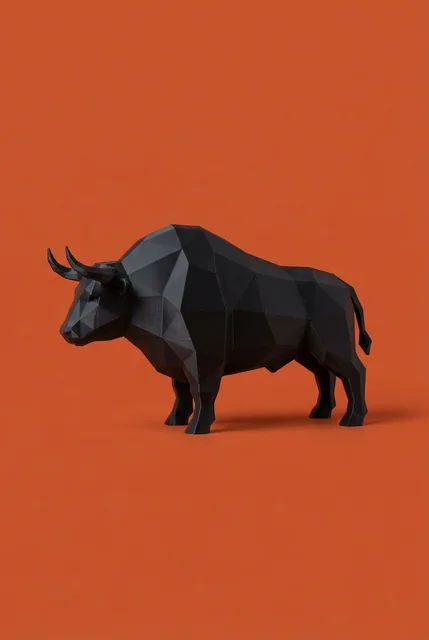
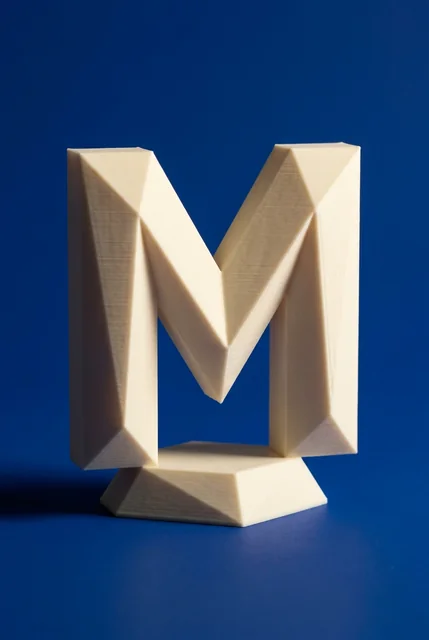
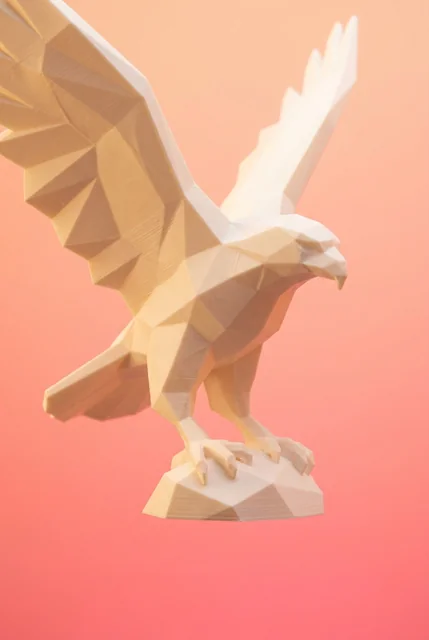


Almost every guide to painting 3D prints is written by a company that sells 3D printers, for someone who owns one. That shapes the advice in ways that matter. It assumes you know exactly which filament came off your own spool, that you are still holding a model with supports attached, and that if the paint job goes wrong you can simply print another one tonight.
If you bought the piece, none of that is true. You have one of it, the supports came off before it shipped, and the material is whatever the maker used. The steps change accordingly: less about post-processing a raw print, more about not damaging something finished and not replaceable.
So this is the version for the collector and the gift-giver — the person holding a printed sculpture, bust or figure who wants it painted, repainted, or touched up where a corner got knocked.
Work out what it is made of first
Material decides both what paint will stick and what heat will ruin, so it is the first question and not a technicality.
Most decorative printed pieces sold today are PLA. PETG turns up on items that need more toughness, ASA on anything meant to live outdoors, and resin on very fine detail work. If the listing does not say, ask the maker — any studio can answer in one line.
If you cannot ask, you can usually tell by looking. A part printed by filament, which covers PLA, PETG and ASA, has fine horizontal layer lines running around it like contour lines on a map. A resin part has no layer lines you can see, and often has small circular nubs where supports met the surface. Beyond that, treat an unknown filament part as PLA and keep it away from heat, which is the conservative assumption in every direction.
Why heat comes up in a painting article: PLA softens at 55 to 60°C, and a sealed or painted part softens at exactly the same temperature. Nothing you do with a brush changes that. We go through the numbers in Is PLA Food Safe?, and they apply to a painted sculpture on a sunny windowsill just as much as to a kitchen item.
Wash it, then think hard about sanding
Wash first. Warm water, a drop of dish soap, a soft brush, then let it dry completely — several hours, not twenty minutes, because water trapped in a seam will come back through your paint. Handling oil from fingers is the most common reason a first coat beads up, and it costs nothing to remove.
Sanding is where most guides give advice that will actively damage a bought piece. The standard instruction is to work from 200 grit up to 2000 to erase layer lines. That is correct for a smooth-surfaced object — a vase, a box, a geometric shape — where the layer lines are the only texture and removing them makes it look moulded rather than printed.
On a sculpted figure it is often the wrong move. The detail you paid for — a face, folds of cloth, feathers, lettering — is frequently shallower than the sandpaper's reach. Two minutes with 400 grit across a bust will take the layer lines off the cheekbone and the eyelid with them, and there is no undo.
The workable rule: sand the flat and simple areas, leave the detailed ones alone. On a figure that means the base, the back, large smooth planes — and hands off the face. If you do sand, go wet, start no coarser than 400, finish at 800, wipe between grits, and pick up the remaining dust with a tack cloth rather than a rag that just moves it around.
The primer question, actually settled
Printer manufacturers say priming is mandatory and that paint will not hold without it. There is a better source than opinion here. GOLDEN Artist Colors ran controlled adhesion tests across eight print materials, grading each on a six-point scale after three days of curing, and published the results.
Their finding for the two materials most decorative prints are made of: acrylics adhered to bare PLA and bare PETG at the top grade, with no primer at all. On PETG, most of the primers they tested slightly reduced adhesion. The materials where primer genuinely mattered were FDM nylon, ABS and TPU — none of which your sculpture is likely to be.
So primer is not doing the job it is usually credited with. On PLA it does three other things, and whether you want them is a real decision:
- It gives one even colour to paint over. Worth a lot if your piece is dark and your paint is light, since thin acrylic over black needs four coats and over grey needs two.
- It fills the finest surface texture, which makes a flat area look smoother.
- It reveals flaws in a single colour so you can fix them before committing.
And the cost is the same cost as sanding: primer is paint, and it buries fine detail. A heavy filler primer sprayed on a small bust will soften the eyes noticeably. If you prime, use a thin spray primer made for plastic, hold it 6 to 8 inches away, and lay down two mist coats rather than one wet one.
Short version: skip primer on a light-coloured PLA figure you are painting with acrylics. Use it on a dark piece, on a large flat surface, or when you want an even base for airbrush work.
Paint that works on PLA
Acrylics, in almost every case. They are water-based, they dry in minutes, they clean up with water, they hold on bare PLA, and they come in the range a figure needs. Craft acrylics are fine for large simple shapes; model paints made for miniatures flow better and cover more evenly on detail, because they are ground finer and formulated thin.
Thin coats are the whole technique. Two or three thin coats look better than one thick one, every time — a heavy coat pools in the recesses, which are exactly the places that give a sculpture its depth. If the paint drags, thin it with water or a proper acrylic medium rather than pushing harder with the brush.
Choose the applicator by what you are painting. A brush suits small pieces and anything where you want control. A spray can suits large single-colour areas and is much faster, but it needs masking, ventilation and a way to hold the piece — mount it on a wooden dowel pushed into an inconspicuous hole, and you can turn it while spraying without fingerprints. An airbrush is worth it only if you are doing gradients or several pieces.
Be careful with solvent-heavy paints. Enamels and lacquers give a harder finish, but some formulations soften PLA. If you want to use them, test on the underside of the base and wait a day before deciding.
Three techniques that make a printed figure look finished
A flat coat of colour on a sculpture reads as a plastic toy. Three steps turn it into something that looks considered, and they are the same three that tabletop miniature painters use.
- Base coat. One even colour across the whole piece, thin, two coats. This is the ground everything else sits on.
- Wash. A dark paint thinned heavily with water, brushed over the whole thing and allowed to settle into the recesses. It pools in every crease and dries darker there, which is what your eye reads as depth. Wipe the raised areas with a damp brush before it dries if it goes too dark.
- Dry brush. Almost no paint on the brush, in a colour lighter than the base, dragged sideways across the raised edges. Wipe most of the paint off on a paper towel first — if the brush leaves a wet mark you have too much. This catches the high points and makes the form pop.
One quiet advantage of a filament-printed piece: the layer lines hold a wash beautifully. What reads as a flaw under flat colour becomes texture once there is shadow in it, which is another argument for not sanding a detailed figure smooth.
Sealing, and where sealed pieces still fail
A clear coat protects the paint from handling and dust, and it sets the final look. Matte is the safest choice on a sculpture: it hides remaining layer lines and reads as stone or ceramic. Satin is a good middle. Gloss looks striking on smooth pieces and cruel on rough ones, because it throws a highlight along every layer line you left.
Spray it the way you sprayed everything else — two thin passes, fully dry between, in ventilation.
Two things a sealer does not fix. It does not stop ultraviolet fading, so a painted piece in a south-facing window will shift colour over a year no matter what is on top of it. And it does not raise the temperature the plastic can take: PLA still softens at 55 to 60°C, and a car interior in an Anaheim summer passes that regularly. Sealed or not, a printed sculpture is an indoor object that should not sit in direct sun.
If you are working out where a finished piece should live, the placement rules are the same as for any other object on a shelf, which we go through in Bookshelf Decorating Ideas.
What not to do to a piece you cannot reprint
- Acetone vapour smoothing. It works on ABS and does nothing useful to PLA, which does not dissolve in acetone. You will get a tacky, clouded surface and no smoothing.
- A heat gun to melt the layer lines. PLA softens before it flows. What you get is a sagging face, not a polished one.
- Dishwashers, ever. The main wash sits at or above the softening point and the part is unsupported on a rack.
- Stripping paint with solvent. Paint remover formulated for wood or metal will attack the plastic underneath faster than the paint on top.
- Testing anything new on the visible side. Every product goes on the underside of the base first, and waits a day.
If you would rather not paint at all
Worth saying plainly, because the honest answer for a lot of pieces is that painting is optional. A printed sculpture in a well-chosen colour, sealed matte, already looks finished — most of the painting guides online exist because their readers are printing in whatever filament was loaded, not because colour has to be added afterwards.
We print our sculptures and figures in 20 colours, chosen when you order, so a single-colour piece needs no paint at all. Painting earns its place when you want more than one colour on one object, when you want a weathered or metallic finish, or when you are touching up a piece that has been knocked. If a stock model is the right subject but the wrong size for your shelf, a custom order can rescale it, up to about 320 mm on a single part.
Frequently asked questions
What kind of paint should I use on 3D prints?
Acrylics for almost everything. They adhere well to PLA and PETG without primer, dry fast, clean up with water, and thin easily. Model acrylics made for miniatures cover detail better than craft acrylics because they are ground finer. Test solvent-based enamels and lacquers on a hidden area first — some soften PLA.
Do I need to prime a 3D print before painting?
Not for adhesion, if the piece is PLA or PETG and you are using acrylics — controlled adhesion testing puts both at the top grade unprimed. Prime when the piece is dark and the paint is light, when you want an even base on a large flat area, or when you want to spot flaws before painting. Skip it on small detailed figures, where primer fills the detail.
Can I paint 3D prints without sanding?
Yes, and on a detailed sculpture you usually should. Sanding removes layer lines and fine detail together, and the detail does not come back. Wash the piece, let it dry, and paint. Sand only flat, simple areas where the layer lines are the only texture present.
How do I stop paint chipping off a printed figure?
Chipping is nearly always thick paint, a dirty surface, or handling before curing. Wash before painting, apply two or three thin coats instead of one heavy one, let each dry fully, and seal with a clear matte coat. Acrylic keeps hardening for a few days after it feels dry, so leave a newly painted piece alone for a week before it gets handled.
Can I repaint a printed piece that is already coloured?
Yes. Wash it, scuff any glossy surface lightly with a fine sanding sponge so the new paint has something to key into, then prime — this is the one case where primer genuinely earns its place, because you are covering an existing colour. Do not use chemical paint stripper: it will damage the plastic before it lifts the paint.
Print Foundry is a 3D printing studio in Anaheim, California. We print sculptures and figures and home decor in PLA, in 20 colors, with PETG and ASA available on request. Material and care questions are answered on our FAQ page. Browse the catalogue at printfoundry.studio or on Etsy.